Showing posts with label flowers. Show all posts

Saturday, December 8, 2012

Kanzashi Flower clip

 I miss not blogging...several reasons I haven't lately....
One -- an issue with uploading photos 
(a message telling me I'm out of space)
The second --- everything I'm making is either a gift for me to give away or a gift for someone else to give away....
 This is my newest obsession...
Kanzashi Flowers
This hair clip is for Mighty
 Originally I intended to use my tie scraps (from the cell phone holders post) but this one is grosgrain ribbon...
Still experimenting to avoid making "granny flowers" as my husband calls them....
Kanzashi were originally a Japanese art form for Geisha's to wear in their hair.  They were made from hand dyed silk and rice glue...
You can Google the term and find all kinds of info....
I'm just totally addicted to making them right now and getting them to look the way I want....
You'll see more of these soon!

Saturday, March 17, 2012

Arles chalk paint and zinc

 I love little tables this size maybe because they're so versatile and I'm always changing things around.... 
Below is how she started out.
and her top was pretty beat up and a little wonky--love that word
 I actually painted her with a coat of latex while we  were working on the dining room set (for a customer) we painted in Emperor's Silk and topped with zinc...that was BEFORE I knew I was going to own my own chalk paint
 So I decided to take another go at the chalk painting after reading the book(Quick and Easy Paint Transformations by Annie Sloan)....*very* helpful I might add.  So thank-you Marykay!!!!
 And I felt like this little piece turned out alot better than my first try.  She says to paint "sloppy", and if you do it gives you a much more textured piece...which is even more apparent once you wax...
 This would be ME working on wrapping the top in zinc.  I wanted to get a little more hands on with this one so I could learn more.  I soldered all the corners and did a lot of the hammering. You can see the tutorial post on topping with zinc here...I have to say that post has been all over the place and is getting tons of traffic....
 So here's the top all finished up.  We also decided to try distressing this one a bit as well as aging, and waxing it.
 A closer look at the top...*those dandelions are from Doodlebug* when he saw me putting flowers and things on the table he wanted to help decorate it.  A boy after my own heart...sigh....
 Some detailed photos of the paint finish and the glass knob...and good texture on the leg in the photo below as well...
And I 'm hoping to do a separate post on the aging process here soon....I'm going to be decorating our church nursery so I've been busy getting ready for that...
A coffee filter project with a little spin and a few other things...
Chic on a Shoestring Decorating
Furniture Feature Fridays

Friday, October 21, 2011

Flower tutorial

I came up with a new flower idea and thought I'd share....
you could make this a pin and add it to whatever--headbands, sweaters, hats 
I've been making pillow slips in fall/winter fabrics...
 The one I made has 6 layers 
2 small (4 petals)
2 medium (5 petals)
2 large (11 petals)

 I started with the 2 small layers--you'll need a strip of fabric (for each layer) about 2" wide.  For the small ones I think mine are about 5" or so long.  Honestly I didn't measure :) The medium layers were about 6" long and the large strips are about 12" long.
You can make it as big or little as you want. Obviously it will change the size of your petals/flower...
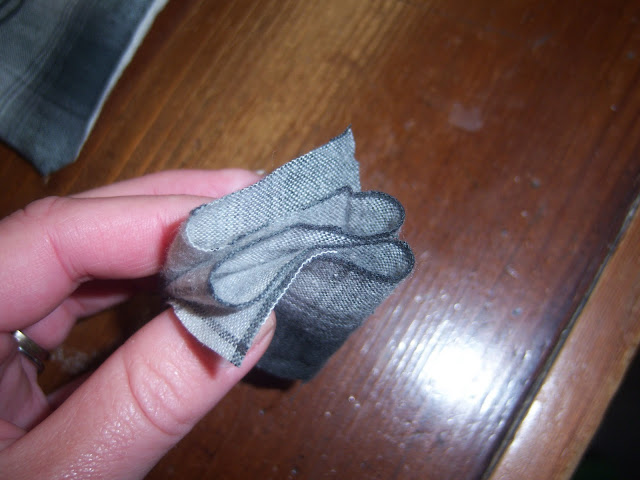
Then accordion fold however many times you need...
4 times for 4 petals (5 times for 5 petals and so on)

Once you've folded cut an upside down "U" shape...remember you want to start and stop about 1/4" from the bottom so they all stay connected just like paper dolls :)
Another view...
Unfold...this is a 5 petal piece...
Thread your needle and knot your thread then use a running stitch about 1/4" from the bottom
All the way to the other end...
Bring your needle and thread back to the beginning and run a stitch or two through the petal you started with to make it into a circle. Knot your thread to finish.

Here I've layered the 2 small, 4 petal layers.  Just run stitches through the centers to keep connecting all of them.
Here it is added to my plaid, flannel pillow slip...I really like the mix of the girly flower with the masculine plaid...
This is one small, 4 petal flower made from the cotton flour sack.  I added some green, flannel leaves on this one...
And here's the whole pillow slip...there are 4 little flowers total.  I've been looking at all the cute little sweaters and shirts that have all the decorations around the collars to see how they do it :)
Then I decided to use a pointed petal shape instead of the rounded "U" shape and I didn't pull the large ones tight in the center...
Fun to play around with!  I love fabric and the change of seasons always inspires me to change things up at our house.  So hopefully I'll be making myself some new pillow slips for our living room soon...white flannel....some felted cashmere maybe...
linking to.....
freckled laundry

Thursday, February 10, 2011

Garden Party

So I'm always looking at Miss Sarah's blog Modern Country Style....love her blog.  She's across the pond ya know!!!  ~~ and having a little party in anticipation of Spring!!!!  So here is my contribution and I'm proud to say this is from my humble back yard .....
I am a big fan of Irises.  Apparently they are very happy where they are currently living out there because they have spread like wildfire.....It's a whole sea of deep purple and green usually right around Mother's day.  Here's another....
Ahhhh just looking at them in all that warm sunshine makes me long for Spring.  What a lovely idea Miss Sarah!!!!